
Spring Boot Starter Data JPA
Spring Boot Starter Data JPA is used to connect the Spring application with a relational database efficiently using a spring-boot-starter-data-jpa dependency, which internally uses a spring-boot-jpa dependency (since Spring Boot version 1.5.3).
Before diving into this topic, let’s understand what is Spring Data JPA.
What is Spring Data & Data JPA
Spring Data is a high-level Spring Source project, which is intended to unify and provide easy access to the different kinds of persistence stores, both in relational database systems and NoSQL data stores.
The JPA in Spring Boot Starter Data JPA is stands for Java Persistent API. While developing a new application, a developer focuses on business logic more than of technical complexity and lots of configuration codes. That’s why the Spring Data JPA and its specifications are extremely important and popular.
The Spring Data JPA provides a layer on the top of JPA, which means it uses all features defined by JPA specification such as entity, mappings, and queries. It also facilitates some of its features such as no-code implementation of the repository pattern and the database queries using the method name.
The Spring Data JPA handles complex JDBC tasks such as database access and ORM (Object Relation Mapping). It avoids writing lots of boilerplate code required by JPA and provides an easy and faster implementation of your persistence layer.
It mainly targets to improve the implementation of data access layers by reducing the effort and time.
Features of Spring Data JPA
The three main features of Spring Data JPA are listed below:
No-code repository: It is one of the major features of the Spring Data JPA, which is popular for persistence-related pattern. It allows us to implement our business code on a higher abstraction level.
Reduced boilerplate code: The Spring Data JPA provides the default implementation for each method by its repository interfaces. Thus, there is no need to implement read and write operations.
Generated Queries: The generated database queries are also one of its main features, it generates the database queries based on the method name.
For the simple database queries, we need to define a method on our repository interface with the name that starts with findBy. After defining the method, Spring will automatically parses the method name and creates a query for it. For example:
public interface EmployeeRepository extends CrudRepository<Employee, Long>
{
Employee findByName(String name);
}
From the above example, we have extended the CrudRepository that uses two generics: Employee and Long. The Employee is the entity that is to be managed, and Long is the data type of primary key.
Spring initially created a JPQL (Java Persistence Query Language) query according to the method name. It is derived using the method signature. It defines the bind parameter value, executes the query and returns the result.
Excluding the above features, there are some additional features, which are listed below:
- Spring Data JPA integrates custom repository code.
- It provides a powerful repository and custom object-mapping abstraction.
- Spring Data JPA supports transparent auditing.
- It implements a domain base class that holds basic properties.
- It supports several other essential modules such as Spring Data JPA, Spring Data MongoDB, Spring Data REST, Spring Data Cassandra, etc.
Spring Data JPA Repository
It provides the following three repositories:
CrudRepository: The CrudRepository offers the basic CRUD operations such as create, read, update, and delete. It has some methods such as findOne(), findAll(), save(), delete(), etc., to perform operations.
PagingAndSortingRepository: It is used to sort and retrieve the data in a paginated way. The PagingAndSortingRepositry extends the CrudRepository and adds the findAll() methods.
JpaRepository:
It is a JPA specific repository which is defined in Spring Data Jpa. The JpARepository extends both repositories; CrudRepository and PagingAndSortingRepository. Furthermore, It adds the JPA-specific methods such as flush() to trigger a flush on the persistence context.
<dependency>
<groupId>org.springframework.data</groupId>
<artifactId>spring-data-jpa</artifactId>
<version>2.4.2</version>
</dependency>
spring-boot-starter-data-jpa Dependency
The Spring Boot provides spring-boot-starter-data-jpa dependency to connect efficiently the Spring Boot applications with the relational database. The spring-boot-starter-data-jpa internally holds the spring-boot-jpa dependency which means it will implement all of its configurations and properties to our Spring Boot Application.
<dependency>
<groupId>org.springframework.boot</groupId>
<artifactId>spring-boot-starter-data-jpa</artifactId>
<version>2.4.2</version>
</dependency>
The Databases are created with tables or relations. The earlier approaches in Java like JDBC was applid using the SQL queries. But, in the JPA, we will store the data from objects into table and vice-versa. However, JPA evolved as result of a different though.
Before JPA, the Hibernate ORM was the most widely used database with these frameworks.
The JPA allows mapping the application classes to table in the database.
Entity Manager: The Entity Managerhandles all the interactions with the database when we defined mapping.
JPQL (Java Persistence Query Language): The JPQL provides a convenient way to write queries to execute the searches according to available entities. The JPQL queries are different from the SQL queries. These queries by default understand the defined mapping between entities. However, we can add additional conditions if needed.
Criteria API: The criteria API is used to define the Java-based API to execute the searches according to the available database.
Difference Between Hibernate and JPA
Hibernate provides the implementation of JPA. It is a very popular ORM (Object Relational Mapping) Java framework, whereas the JPA is an API ( Application Programming Interface) that defines the specification of the application. The Hibernate is responsible for understanding the mappings that are defined between objects and tables. Furthermore, it ensures that data is being retrieved or stored from the database based on the mapping. It provides additional functionality on the top of the JPA.
How to Use Spring Boot Starter Data JPA in Our Spring Boot Project
We are going to use Spring Boot starter data JPA with the H2 Database. Follow the below steps:
Step1: Open Spring Initializr
The easiest way to bootstrap a Spring Boot project is Spring Initializr. Open the spring Initializr by this link:
Step2: Provide the Project Details
Now, in the Spring Initializr window, provide some basic details of the Project such as GroupId and ArtifactId.
We have provided com.javasterling as groupId and spring-boot-jpa-demo as artifact id.
Step3: Add the Required Dependencies
Now, you can find out the dependencies option in our Spring Initializr window. Add the required dependencies. As for our current project add Spring Web, Spring Data JPA, and H2.
Our project configuration will look like as follows:

Step4: Now, click on the Generate option. It will create an auto-configured project.
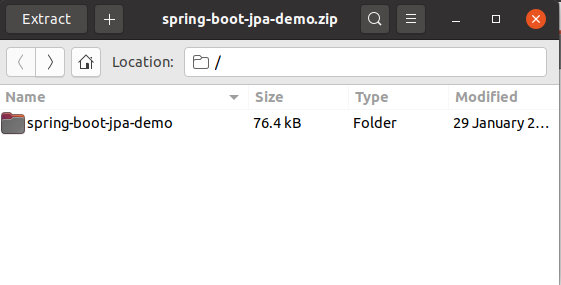
Step5: Extract this project to a specific directory.
Step6: Import the project in an IDE
Here, we are using the STS IDE so we will import this project in STS. To import in STS, open STS IDE and Navigate to File-> Open Project from the file system menu browse the directory where you had stored this project.
Click on the Open Option.
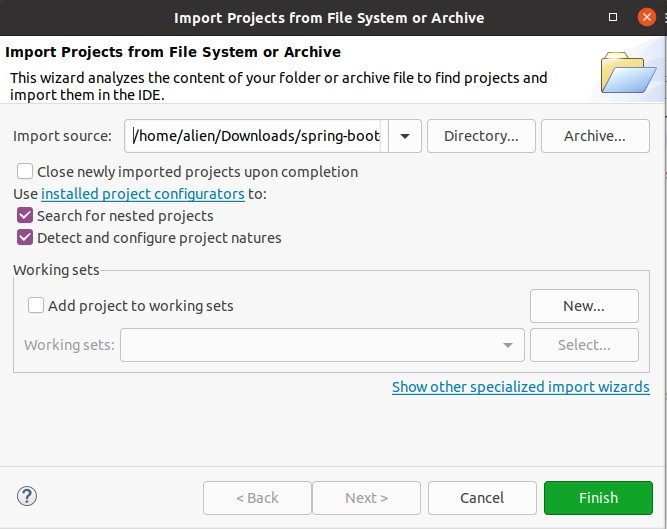
Now, after this click on the Finish button to complete the process.
Hence, we have successfully imported the project.
See more about How to Create and Import Project in STS and Eclipse IDE.
Step7: Create a Controller Package
Now, the next step is to create a controller class. Before creating a controller class, create a package com.javasterling.controller in src/main/java project directory.
Step8: Create a Controller Class
Create a controller class named ControllerDemo.java under the package com.javasterling.controller:
ControllerDemo.java:
package com.javasterling.controller;
import org.springframework.stereotype.Controller;
import org.springframework.web.bind.annotation.RequestMapping;
@Controller
public class ControllerDemo
{
@RequestMapping("/")
public String index()
{
return "index.jsp";
}
}
Step9: Create a Model
Create a model package named com.javasterling.model in the src/main/java directory:
Step10: Create an Employee class
Create an employee class in the model package:
Employee.java:
package com.javasterling.model;
import javax.persistence.Entity;
import javax.persistence.Id;
import javax.persistence.Table;

@Entity
@Table(name="empdata")
public class Employee {
	@Id
private int id;
private String empname;
public int getId() {
	return id;
}
public void setId(int id) {
	this.id = id;
}
public String getEmpname() {
	return empname;
}
public void setEmpname(String empname) {
	this.empname = empname;
}
@Override
public String toString()
{
return "Employee [id=" + id + ", ename=" + empname + "]";
}
}
Now, we need to configure the H2 Database.
Step11: Configure the H2 Database
To configure the H2 Database, open the application.properties file of your project and add the following configuration:
application.properties:
server.port=8090
spring.h2.console.enabled=true
spring.datasource.platform=h2
spring.datasource.url=jdbc:h2:mem:javasterling
The application.properties file can be found under the src/main/resources directory.
Step12: Create a SQL file
Create a SQL configuration file named data.sql in the src/main/resource directory. Create a SQL file in the folder src/main/resources. To create a SQL file right click on the src.main/resource folder and navigate to New->File-> Type the file name (data.sql)-> Finish.
Now, insert the following queries in it:
data.sql:
insert into empdata values(101,'Harry');
insert into empdata values(102,'Joe');
insert into empdata values(103,'Ivanka');
insert into empdata values(104,'Sofia');
insert into empdata values(105,'Sam');
Step13: Create JSP files
Now, we are about to our final steps. To create a JSP file, first create a folder named webapp in the src folder.
Now, create index.jsp file in it with the following content:
index.jsp:
<%@ page language="java" contentType="text/html; charset=UTF-8"
    pageEncoding="UTF-8"%>
<!DOCTYPE html>
<html>
<head>
<meta charset="UTF-8">
<title>Insert title here</title>
</head>
<body>
<form action="addUser">
ID :<br />
<input type="text" name="t1"><br />
User name :<br />
<input type="text" name="t2"><br />
<input type="submit" value="Add">
</form>
</body>
</html>
Here, we have successfully created a Spring Boot project using the Starter Data JPA dependency with H2 Database.
Step14: Test the Project
To run this application, select and run the SpringBootJpaDemoApplication.java file.
We can check out the console that whether our application is successfully running on or not. It should be run on port 8090 (According to this example).
To access the H2 console, Open the browser and invoke the URL http://localhost:8090/h2-console/. It will display the Driver Class, JDBC URL that we have configured in the application.properties file, and the default User Name.
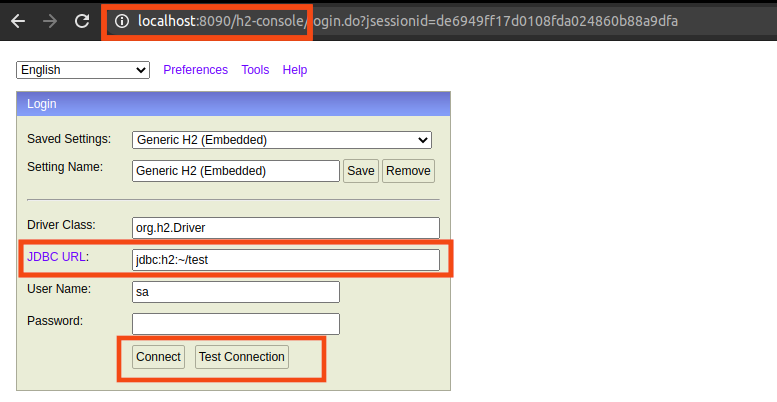
Click on the Connect button to view the structure of the table empdata that we have defined in the Employee.java.
Conclusion:
In this article, we have discussed how to use Spring Boot starter data JPA with H2 Database.
See Also,
Spring Boot Starters
Spring Boot Starter Web
Spring Boot Starter Parent
Spring Boot Starter Test
Spring Boot Dependencies
Spring Boot Annotations