
How to Create a Spring Boot Project Using Eclipse
The Spring Boot project can be created in multiple ways; in this tutorial, we will see the easiest way to create a Spring Boot project using Spring Intializr in eclipse:
Below are the steps for creating a basic Spring Boot projects:
- Open Spring initializr by navigating to https://start.spring.io/
- Enter the project details such as build tool, language, SB version, Group, Artifact, etc.
- Click on Generate
- Extract the zip or rar file
- Open Eclipse
- Import the project
- Run the Spring Boot Application
Before moving forward, let’s understand the basic requirements for creating a Spring Boot application:
- JDK must be installed on our machine (in this tutorial, we are using Java 8, but it will be work on higher versions as well) ( See how to install Java)
- An IDE ( In this tutorial, we are using eclipse) (See how to install eclipse)
Let’s understand these steps in detail:
Step1: Open the Spring Initializr
The first step is to create a Spring Boot project using Spring Initializr is to open it. To open it, navigate to https://start.spring.io/ .
Step2: Enter the project details
The Spring Initializr’s interface will look as follows. Enter the project details on it. In this project, we are providing the following details:
Project: Maven
Language: Java
Spring Boot: 2.4.1
Group: com.javasterling.sb
Artifact: SpringBootDemo
Packaging: jar
Java: 8
Most of the details will be auto filled, but you can type your details and choose your preferences. The Group name is the base of a company or group, and the Artifact is a project name.

Step3: click on Generate
It will generate your Spring Boot project and download it in the selected packaging format. We have selected the jar option in the packaging field. So it will be downloaded in zip file format.

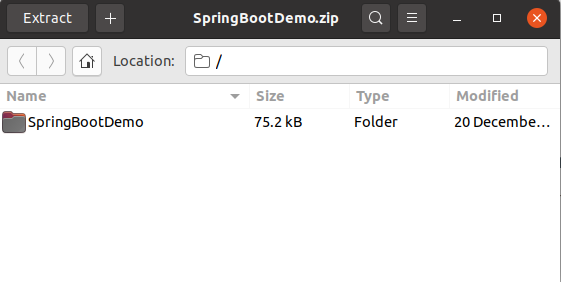
Step4: Extract the Zip File
Now, extract this zip file to your directory.
Step5: Open Eclipse
Now, open your favorite IDE. In this tutorial, we are using eclipse, so open eclipse IDE.
Step6: Import Project
To import an eclipse IDE project, navigate to File-> Open Projects from the File System menu. Click on the Directory option and select the project from your directory where you have extracted it.

It will start exporting it to eclipse. It will take a while and import all the project data. We can check the progress by clicking on the status icon given at the bottom of the eclipse editor:

Step7: Run the Spring Boot Application
Once the importing process is completed, we can run our project. To run this project, navigate to project structure and right-click on the project and select Run As -> Java Application option:

It will open a dialog window to specify the application. Select the SpringApplication option and hit OK to continue:

It will take a while to load the project data and run our first Spring Boot application.
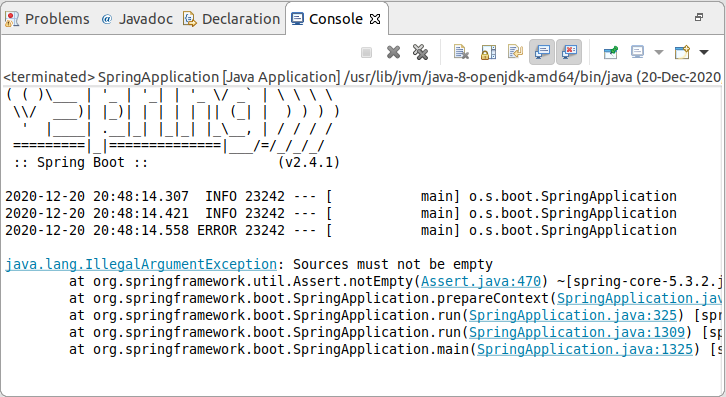
Hence, we have successfully created and run our first Spring Boot application. Let’s understand it’s internal structure.
Spring Boot Project Directory
The Spring Boot Project directory looks as follows:
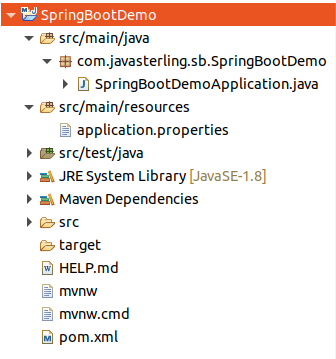
It is a default directory created by Spring Boot using the Spring Initializr. We have not included any file or data in it. It contains the following file data:
SpringBootDemoApplication.java:
package com.javasterling.sb.SpringBootDemo;

import org.springframework.boot.SpringApplication;
import org.springframework.boot.autoconfigure.SpringBootApplication;

@SpringBootApplication
public class SpringBootDemoApplication {

	public static void main(String[] args) {
		SpringApplication.run(SpringBootDemoApplication.class, args);
	}

}
pom.xml:
<?xml version="1.0" encoding="UTF-8"?>
<project xmlns="http://maven.apache.org/POM/4.0.0" xmlns:xsi="http://www.w3.org/2001/XMLSchema-instance"
	xsi:schemaLocation="http://maven.apache.org/POM/4.0.0 https://maven.apache.org/xsd/maven-4.0.0.xsd">
	<modelVersion>4.0.0</modelVersion>
	<parent>
		<groupId>org.springframework.boot</groupId>
		<artifactId>spring-boot-starter-parent</artifactId>
		<version>2.4.1</version>
		<relativePath/> <!-- lookup parent from repository -->
	</parent>
	<groupId>com.javasterling.sb</groupId>
	<artifactId>SpringBootDemo</artifactId>
	<version>0.0.1-SNAPSHOT</version>
	<name>SpringBootDemo</name>
	<description>Demo project for Spring Boot</description>

	<properties>
		<java.version>1.8</java.version>
	</properties>

	<dependencies>
		<dependency>
			<groupId>org.springframework.boot</groupId>
			<artifactId>spring-boot-starter</artifactId>
		</dependency>

		<dependency>
			<groupId>org.springframework.boot</groupId>
			<artifactId>spring-boot-starter-test</artifactId>
			<scope>test</scope>
		</dependency>
	</dependencies>

	<build>
		<plugins>
			<plugin>
				<groupId>org.springframework.boot</groupId>
				<artifactId>spring-boot-maven-plugin</artifactId>
			</plugin>
		</plugins>
	</build>

</project>
application.properties file is empty.
SpringBootDemoApplicationTests.java:
package com.javasterling.sb.SpringBootDemo;

import org.junit.jupiter.api.Test;
import org.springframework.boot.test.context.SpringBootTest;

@SpringBootTest
class SpringBootDemoApplicationTests {

	@Test
	void contextLoads() {
	}

}
JRE System Library
JRE System Library contains the following library files:

Maven Dependencies
It contains lots of dependencies. Later we will discuss them all in the other section. It contains the following dependencies:
